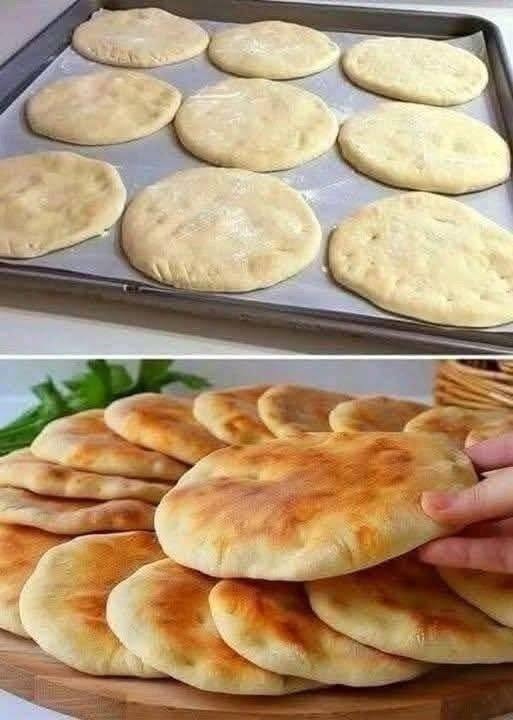
Don’t overcrowd the skillet. Cook one flatbread at a time to maintain consistent heat and ensure even cooking. Flipping too often can prevent proper puffing, so try to stick to just one flip after the initial bubbles appear. If your flatbreads aren’t puffing, don’t despair! They will still be soft and delicious, perfect for wraps or simply tearing and dipping. The puffing is a bonus, not a requirement for an amazing flatbread experience. Lastly, always keep the cooked flatbreads covered with a clean kitchen towel. This traps the steam, which is essential for keeping them soft and pliable as they cool.
Storage and Reheating
Proper storage is key to maintaining the softness and freshness of your homemade skillet flatbreads. Once the flatbreads have cooled completely to room temperature, stack them and place them in an airtight container or a large resealable plastic bag. Make sure to press out as much air as possible before sealing. Stored this way, they will remain fresh and soft at room temperature for up to 2-3 days. For longer storage, you can refrigerate them for up to 5 days, though they may lose a little bit of their initial softness.
For extended storage, homemade flatbreads freeze beautifully. Once completely cooled, stack them with a piece of parchment paper between each flatbread to prevent sticking. Place the stack in a freezer-safe resealable bag or airtight container, removing as much air as possible. They can be frozen for up to 2-3 months. When you’re ready to use them, simply transfer them from the freezer to the refrigerator overnight to thaw, or you can reheat them directly from frozen using the methods below.
Reheating these flatbreads is quick and easy, bringing them back to their soft, warm glory. The best method for reheating will depend on how many you’re reheating and how much time you have. For single servings, a microwave works well. Wrap an individual flatbread in a damp paper towel and microwave on high for 15-30 seconds, or until warm and pliable. Be careful not to over-microwave, as this can make them tough.
For multiple flatbreads, or if you prefer a slightly crispier exterior, reheating in a skillet is an excellent option. Place the flatbreads in a dry skillet over medium heat for about 30-60 seconds per side, until warmed through and slightly pliable. You can also lightly brush them with a tiny bit of olive oil before reheating in the skillet for extra flavor and moisture. Another great method is to wrap them in foil and warm them in a preheated oven at 300°F (150°C) for 5-10 minutes. This method is particularly good for reheating a larger batch and helps to keep them soft and moist.
If reheating from frozen, you can often place them directly into a hot skillet or oven (wrapped in foil) for a slightly longer time, until thawed and heated through. Avoid reheating them too many times, as this can degrade their texture. With these simple storage and reheating tips, you can enjoy your delicious homemade skillet flatbreads for days or even weeks after baking!
Frequently Asked Questions
Why didn’t my flatbread puff up?
There are a few common reasons why your flatbread might not puff. The most frequent cause is that your skillet wasn’t hot enough. A very hot skillet creates an instant burst of steam inside the dough, which causes it to puff. Other reasons could be that the dough was rolled too thick or too thin, or unevenly. Also, if the dough rested too long after being rolled, it might dry out slightly, preventing it from puffing. Ensure your yeast was active and the dough had a good rise, as a healthy dough is more likely to puff.
Can I make this recipe without yeast?
Yes, you can make a version of flatbread without yeast, but it won’t have the same light, airy texture or the characteristic pita-style pocketing. For a yeast-free flatbread, you would typically use baking powder and/or baking soda as a leavening agent. The resulting bread would be denser and more like a traditional naan or stovetop roti. This particular recipe is designed for yeast to achieve that soft, pliable, and puffable pita-style result.
Can I prepare the dough ahead of time?
Absolutely! Preparing the dough in advance is a great time-saver. After the first rise, you can punch down the dough, form it into a ball, and place it in a lightly oiled airtight container in the refrigerator for up to 24 hours. When you’re ready to cook, take the dough out of the fridge about 30-60 minutes before you plan to roll and cook, allowing it to come closer to room temperature. Then proceed with dividing, rolling, and cooking as per the instructions.
What if my dough is too sticky or too dry?
Dough consistency can vary slightly depending on factors like humidity and the specific flour used. If your dough is too sticky after kneading, add a very small amount of flour (half a tablespoon at a time) and continue kneading until it’s smooth and elastic but no longer tacky. If your dough is too dry or stiff, add a tiny bit of warm water (a teaspoon at a time) and knead it in until the dough becomes more pliable and soft. The goal is a dough that is soft, smooth, and easy to handle without being excessively sticky.
For Complete Cooking STEPS Please Head On Over To Next Page Or Open button (>)
For Complete Cooking STEPS Please Head On Over To Next Page Or Open button (>)